Zadum4ivii (talk | contribs) (Added new information, added boss minions infoboxes) |
No edit summary Tag: Visual edit |
||
| (27 intermediate revisions by 16 users not shown) | |||
| Line 5: | Line 5: | ||
| ai = Wall of Shadows AI |
| ai = Wall of Shadows AI |
||
| damage = 64 / {{expert|160}} |
| damage = 64 / {{expert|160}} |
||
| − | | life = 36000 / {{expert| |
+ | | life = 36000 / {{expert|45000}} |
| knockback = 100 |
| knockback = 100 |
||
| defense = 57 |
| defense = 57 |
||
| − | | debuff = Shadowflame |
+ | | debuff = Shadowflame | debufflink = yes |
| duration = 4 seconds |
| duration = 4 seconds |
||
| debufftip = Losing life. |
| debufftip = Losing life. |
||
| Line 15: | Line 15: | ||
| debufftip2 = Decreased light vision |
| debufftip2 = Decreased light vision |
||
| money = {{gc|17}} |
| money = {{gc|17}} |
||
| ⚫ | |||
| − | | Flask of Shadows|1|{{expert|100%}} |
||
| Heavy Beam Cannon|1|100% |
| Heavy Beam Cannon|1|100% |
||
| Bolter|1|33% |
| Bolter|1|33% |
||
| Line 23: | Line 21: | ||
| Wall of Shadows Mask|1|14.29% |
| Wall of Shadows Mask|1|14.29% |
||
| Darkness Cloth|9-14|100% |
| Darkness Cloth|9-14|100% |
||
| + | | custom| {{item|Treasure Bag (Wall of Shadows)|Treasure Bag|note=(Wall of Shadows)|wrap=y}} |
||
| ⚫ | |||
| + | | image2 = Map Icon Wall of Shadows (eye).png |
||
| + | | image2caption = Map icon (eye) |
||
| + | | image3 = Map Icon Wall of Shadows (mouth).png |
||
| + | | image3caption = Map icon (mouth) |
||
}} |
}} |
||
| ⚫ | |||
| ⚫ | |||
| + | |||
| ⚫ | |||
| ⚫ | |||
| + | |||
| ⚫ | |||
| ⚫ | |||
| + | |||
| ⚫ | |||
| ⚫ | |||
| ⚫ | |||
| ⚫ | |||
| ⚫ | |||
| + | |||
| ⚫ | |||
| ⚫ | |||
| ⚫ | |||
| ⚫ | |||
| + | |||
| ⚫ | |||
| ⚫ | |||
| ⚫ | |||
| ⚫ | |||
| ⚫ | |||
| ⚫ | |||
| + | |||
| + | ===Summons=== |
||
| + | {|v-align=top |
||
| ⚫ | |||
| name = Shadow Hand |
| name = Shadow Hand |
||
| − | | |
+ | | namesub = Detached |
| ⚫ | |||
| − | | image = ShadowHand1.png |
||
| − | | |
+ | | image = Shadow Hand.png |
| ⚫ | |||
| damage = 60 / {{expert|160}} |
| damage = 60 / {{expert|160}} |
||
| life = 780/ {{expert|11300}} |
| life = 780/ {{expert|11300}} |
||
| knockback = 100 |
| knockback = 100 |
||
| defense = 25 |
| defense = 25 |
||
| − | | debuff = Shadowflame |
+ | | debuff = Shadowflame | debufflink = yes |
| duration = 4 seconds |
| duration = 4 seconds |
||
| debufftip = Losing life. |
| debufftip = Losing life. |
||
}} |
}} |
||
| ⚫ | |||
| − | |||
| ⚫ | |||
| name = Shadow Hand |
| name = Shadow Hand |
||
| − | | |
+ | | namesub = Attached |
| + | | type = Enemy |
||
| − | | image = ShadowHand2.png |
||
| + | | image = Shadow Hand (attached).png |
||
| ⚫ | |||
| ⚫ | |||
| damage = 56 / {{expert|160}} |
| damage = 56 / {{expert|160}} |
||
| life = 780/ {{expert|11300}} |
| life = 780/ {{expert|11300}} |
||
| knockback = 100 |
| knockback = 100 |
||
| defense = 24 |
| defense = 24 |
||
| − | | debuff = Shadowflame |
+ | | debuff = Shadowflame | debufflink = yes |
| duration = 4 seconds |
| duration = 4 seconds |
||
| debufftip = Losing life. |
| debufftip = Losing life. |
||
}} |
}} |
||
| ⚫ | |||
| − | |||
| − | {{npc infobox |
||
| − | | name = Shadow Steed |
||
| ⚫ | |||
| − | | image = ShadowSteed.png |
||
| ⚫ | |||
| − | | damage = 75 / {{expert|160}} |
||
| − | | life = 940/ {{expert|11300}} |
||
| − | | knockback = 100 |
||
| − | | defense = 30 |
||
| − | | debuff = Shadowflame | debufflink = yes |
||
| − | | duration = 4 seconds |
||
| − | | debufftip = Losing life. |
||
| ⚫ | |||
| − | |||
| ⚫ | |||
| − | |||
| − | {{ Minimap icon |
||
| − | |image= [[file:WallofShadows_Head_Boss.png]] |
||
| − | }} |
||
| − | {{ Minimap icon |
||
| − | |image= [[file:WallOfShadow_Head_Boss1.png]] |
||
| − | }} |
||
| − | |||
| ⚫ | |||
| ⚫ | |||
| − | |||
| ⚫ | |||
| ⚫ | |||
| − | |||
| ⚫ | |||
| ⚫ | |||
| ⚫ | |||
| ⚫ | |||
| ⚫ | |||
| ⚫ | |||
| ⚫ | |||
| ⚫ | |||
| ⚫ | |||
| − | |||
| ⚫ | |||
| ⚫ | |||
| ⚫ | |||
| ⚫ | |||
| ⚫ | |||
| ⚫ | |||
==Notes== |
==Notes== |
||
* Build a long platform to kite it so you don't fall into the lava or have to worry about platforming. |
* Build a long platform to kite it so you don't fall into the lava or have to worry about platforming. |
||
* Avoid the lasers; the lasers can kill you when you're near the boss. |
* Avoid the lasers; the lasers can kill you when you're near the boss. |
||
| − | * When throwing a [[Shadow Relic]] in the lava of the Underworld, the |
+ | * When throwing a [[Shadow Relic]] in the lava of the Underworld, the [[Dryad]] NPC will be killed and the Wall of Shadows will be summoned. |
| − | |||
| − | ==Interesting Facts== |
||
| ⚫ | |||
| ⚫ | |||
| + | ==Trivia== |
||
| ⚫ | |||
| ⚫ | |||
| + | * Unlike the Wall of Flesh, which spawns on the side of the Underworld you're closest to, the Wall of Shadows will spawn on a random side of [[the Underworld]], so it is recommended to start the fight in the middle of the Underworld. |
||
| + | |||
==History== |
==History== |
||
| − | + | {{history|Remastered 1.3.1.7|No longer a Wall of Flesh counterpart, moved to another tier and has better AI.}} |
|
| − | + | {{history|Remastered 1.3|Introduced.}} |
|
Latest revision as of 21:17, 24 October 2021
Wall of Shadows
Statistics
| Type | Boss |
|---|---|
| Environment | Underworld |
| AI Type | Wall of Shadows AI |
| Damage | 64 / 160 |
| Max Life | 36000 / 45000 |
| Defense | 57 |
| KB Resist | 100% |
| Inflicts debuff | |
| Debuff duration | 4 seconds |
| Debuff tooltip | Losing life. |
| Inflicts debuff | |
| Debuff duration | While Wall of Shadows is alive. |
| Debuff tooltip | Decreased light vision |
Drops
| Coins | 17 |
|---|
- Item (Quantity)Rate
- 100%
- 33%
- 100%
- 10%
- 14.29%
 Darkness Cloth (9-14)100%
- Treasure Bag(Wall of Shadows)
100%
The Wall of Shadows is a Hardmode boss. Before the 1.3.1.7 update, it served as a Wall of Flesh counterpart for worlds with Corruption.
Spawn[ | ]
It does not spawn on its own, the only way to summon it is to throw a Shadow Relic into lava in the underworld (Much like in the Wall of Flesh). The boss can be only summoned if Plantera is defeated and there is a Dryad in the world. After throwing Shadow Relic the Dryad will die.
Behavior[ | ]
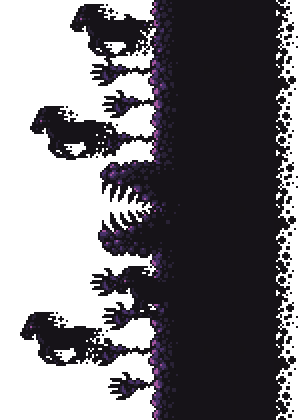
The Wall of Shadows behaves almost exactly as the Wall of Flesh does but has a different physical appearance. Unlike the Wall of Flesh, which has two eyes and one mouth, the Wall of Shadows only has one eye on the first phase which turns into a mouth on the second phase.
Attacks[ | ]
First stage[ | ]
- Spawns with Shadow Hands hanging on chains which move toward the player and damage them. When a Shadow Hand is killed, the chain is broken and the Shadow Hand chases the player.
- Rapidly shoots purple lasers.
- Shoots a round of purple lasers.
Second stage[ | ]
- Has attacks from first stage.
- Summons Shadow Steeds that chase the player.
- Shoots a large shadowbeam that can bounce off walls.
Expert Mode[ | ]
- Shadow Hands can't despawn while the Wall of Shadows is still alive.
- The Wall of Shadows moves faster as it's health depletes.
- It can reach up to 50 mph when below 500 HP (As compared to the Hermes Boots at only 30 mph, Lightning Boots at 34, and the bunny mount at 38).
- Shoots lasers more rapidly.
- Can inflict Shadowflame debuff on player for 4 seconds.
Summons[ | ]
Shadow HandDetached Statistics
|
Shadow HandAttached Statistics
|
Notes[ | ]
- Build a long platform to kite it so you don't fall into the lava or have to worry about platforming.
- Avoid the lasers; the lasers can kill you when you're near the boss.
- When throwing a Shadow Relic in the lava of the Underworld, the Dryad NPC will be killed and the Wall of Shadows will be summoned.
Trivia[ | ]
- The Wall of Shadows Boss and its attacks came from a suggestion made by Zoomo
- The Wall of Shadows bears a resemblance to Wall of Flesh, but it possesses different attacks and stats.
- Unlike the Wall of Flesh, which spawns on the side of the Underworld you're closest to, the Wall of Shadows will spawn on a random side of the Underworld, so it is recommended to start the fight in the middle of the Underworld.
History[ | ]
- Remastered 1.3.1.7: No longer a Wall of Flesh counterpart, moved to another tier and has better AI.
- Remastered 1.3: Introduced.